
Business
How to Make Exceptional Bike Custom Stickers?
Bike Custom Stickers Customizing your bike with stickers is not only a fun way to express your personality
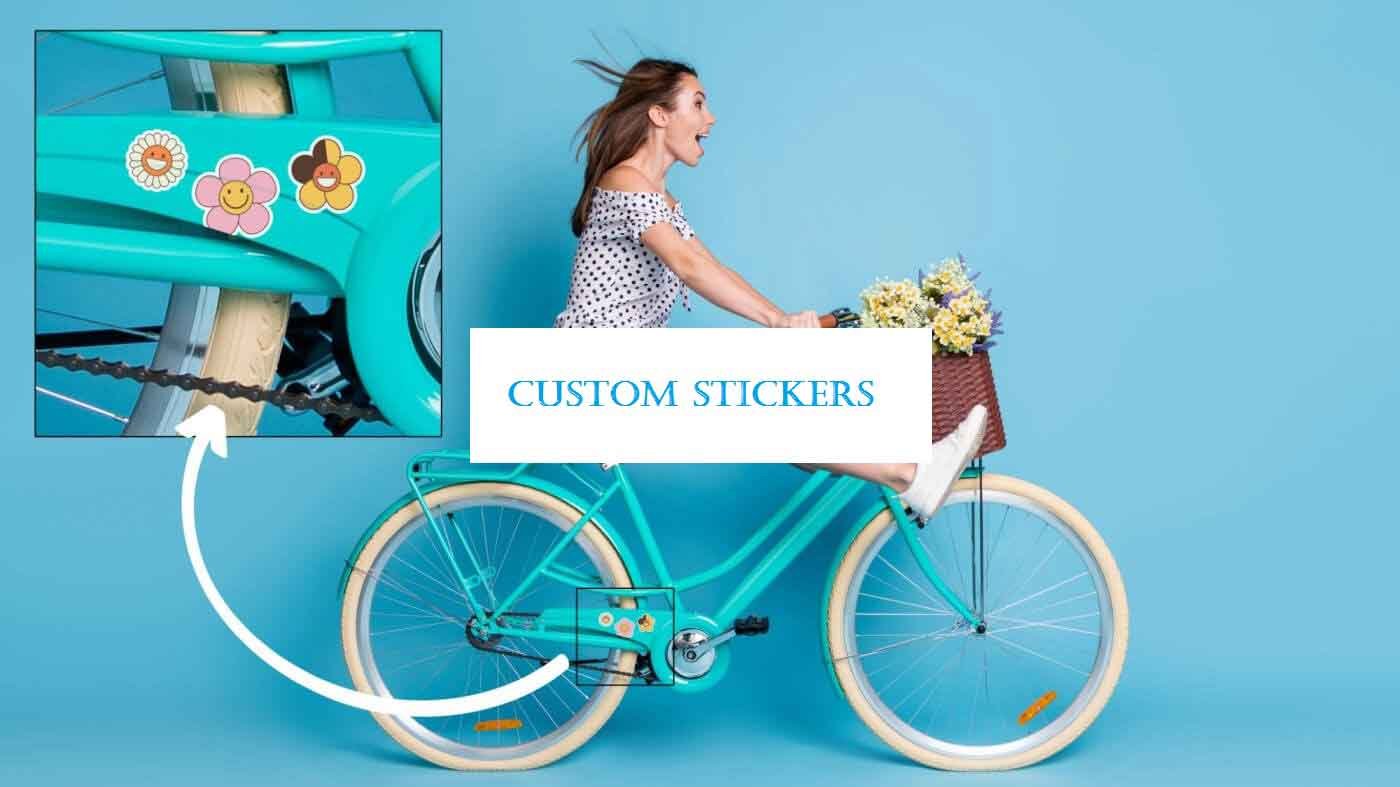
Customizing your bike with stickers is not only a fun way to express your personality but also a practical means of promoting your brand or message. However, creating exceptional bike custom stickers involves more than just slapping a design onto vinyl. It requires careful planning, attention to detail, and a thorough understanding of the design and production process. In this comprehensive guide, we’ll delve deeper into each step to help you create custom stickers that stand out from the crowd.
Conceptualizing the Design
When conceptualizing your sticker design, think about the message or impression you want to convey. Are you aiming for a bold and eye-catching design, or do you prefer something more subtle and sophisticated? Consider elements such as imagery, typography, and color scheme that align with your vision and complement your bike’s aesthetics.
Choosing the Right Materials
The quality of materials used can significantly impact the durability and appearance of your custom stickers. Opt for high-quality vinyl or polyester materials that are weather-resistant and UV-stable to ensure longevity, especially if your bike spends a lot of time outdoors.
Understanding the Printing Process
Whether you choose digital printing or screen printing, understanding the printing process is essential for achieving the desired results. Familiarize yourself with color profiles, resolution requirements, and printing techniques to ensure that your design translates well onto the sticker material.
Design Software Selection
Selecting the right design software is crucial for bringing your sticker design to life. Programs like Adobe Illustrator or CorelDRAW offer powerful tools for creating vector-based designs, allowing for precise control over every element of your artwork.
Design Composition
Pay careful attention to the composition of your sticker design, ensuring that it is visually appealing and effectively communicates your message. Experiment with different layouts, font combinations, and graphic elements to find the perfect balance and harmony.
Incorporating Brand Identity
If you’re creating custom stickers for branding purposes, it’s important to incorporate elements of your brand identity into the design. This may include your logo, color palette, and brand messaging to ensure consistency across all marketing materials.
Color Selection
Choose colors that not only complement your bike’s color scheme but also evoke the desired emotions or associations. Consider the psychological effects of different colors and how they can influence the perception of your sticker design.
Typography Considerations
Typography plays a crucial role in the legibility and overall aesthetics of your sticker design. Choose fonts that are easy to read, especially at smaller sizes, and consider the spacing and arrangement of text to ensure clarity and visual appeal.
Adding Visual Effects
Visual effects such as gradients, shadows, or textures can add depth and dimensionality to your sticker design. However, use these effects sparingly to avoid overwhelming the viewer and detracting from the overall message.
Test Printing
Before committing to mass production, it’s essential to conduct test prints to ensure that your design translates well onto the sticker material. This allows you to make any necessary adjustments to colors, resolution, or layout before finalizing your design.
Precision Cutting
Precision cutting, especially in the case of custom die cut stickers, is crucial for achieving clean edges and seamless integration with your bike’s surface. Invest in a quality cutting machine capable of handling custom die cut designs or seek professional cutting services specializing in intricate shapes and precise cuts. This ensures accuracy and consistency in the cutting process, allowing your custom die-cut stickers to fit flawlessly onto your bike and create a visually stunning appearance.
Application Techniques
Mastering proper application techniques is a key to ensuring that your custom stickers adhere smoothly and securely to your bike’s surface. Clean the surface thoroughly before applying the stickers and use tools like squeegees to remove any air bubbles or wrinkles for a professional finish.
Surface Compatibility
Consider the material of your bike’s surface when selecting adhesives for your custom stickers. Choose adhesives that are compatible with a variety of surfaces and that provide strong, long-lasting adhesion without causing damage or leaving residue behind.
Protective Coating
Applying a protective coating, such as clear vinyl laminate, can help prolong the life of your custom stickers by providing added durability and weather resistance. Choose a finish that complements your design and provides the level of protection you need.
Regular Maintenance
Once your custom stickers are applied, it’s important to maintain them properly to ensure that they continue to look their best over time. Regular cleaning and inspection can help prevent damage and fading, keeping your bike looking fresh and vibrant for years to come.
Last Words
By following these steps and paying attention to the details, you can create custom stickers for your bike that are truly exceptional. Whether you’re looking to add a personal touch to your ride or promote your brand in style, the key is to invest time and effort into the design and production process to achieve the best possible results.
Table of Contents

Why Choose Diaphragm Pumps for Your Needs

Streamline Your Business Operations with Professional IT Hardware Installation Services

Understanding the Role of Low-Code Platforms in Enterprise Application Development

Strengthen Your Business with Managed Endpoint Security: A Comprehensive Guide

The Essential Guide to Software Workflow Management

The Impact of Custom Printed Pennant Flags on Community Events and Festivals

6 Reasons Why Your Dog Needs a Custom Bandana

Why the Ugreen USB C Charger is a Travel Must-Have

Sportzfy The Ultimate Hub for Sports Enthusiasts

Sportzfy TV Your Sports Hub

Top High Paying Affiliate Programs

The //vital-mag.net blog: A Comprehensive Overview

Healthcare mobile app development: short guide 2024

Top Must-Have Features For News & Media App Development

Some of the Best Futures Features to Look For

Nighttime Miami ATV Riding: Exploring Trails Under the Stars

Understanding Pikruos: A Comprehensive Guide to its Origins, Usage, and Impact

Best sites to buy Instagram likes Poland

Walton vs Singer Refrigerators in Bangladesh: Which One Is Better?

Cheap SEO Tools Provider with 500+ Premium Tools – Best Group Buy SEO Tools
Why Choose Diaphragm Pumps for Your Needs
Streamline Your Business Operations with Professional IT Hardware Installation Services
Understanding the Role of Low-Code Platforms in Enterprise Application Development

Sepatuindonesia.com | Best Online Store in Indonesia
Top High Paying Affiliate Programs

Automating Your Window Treatments: The Advantages of Auto Blinds
-
 Business5 months ago
Sepatuindonesia.com | Best Online Store in Indonesia
-
 Technology3 weeks ago
Top High Paying Affiliate Programs
-
 Tech5 months ago
Automating Your Window Treatments: The Advantages of Auto Blinds
-

 Tech5 months ago
Unleash Your Potential: How Mecha Headsets Improve Productivity and Focus
-
 Instagram2 years ago
Free Instagram Follower Without Login
-
 Reviews11 months ago
Android Laptop vs. Chromebook: Which one is better?
-
 Instagram2 years ago
IGTOK – Get Instagram Followers, Likes & Comments
-

 Business8 months ago
Follow These 5 Tips To Avail Personal Loans At Lower Interest Rates