
Apps
Building a Progressive Web App (PWA) with React JS: Step-by-Step Guide

With the rapid evolution of web technologies, Progressive Web Apps (PWAs) have emerged as a powerful solution, blending the functionalities of web and mobile applications. As more businesses turn to Progressive Web App Development, React JS stands out as a top tool, owing to its flexibility and powerful ecosystem.
Step-by-Step Guide to Developing a PWA with React JS
Below, we share a step-by-step guide to walk you through the development of a PWA with React JS.
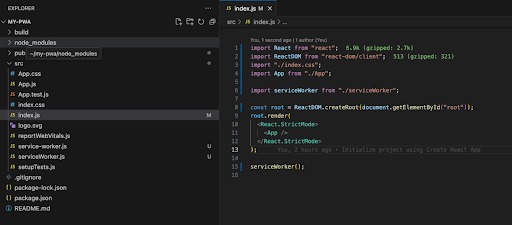
Step 1: Setting Up Your React Project
To kick off your Progressive Web App Development journey, you’ll need to set up a React project. The easiest way to get started is by using Create React App, which includes a service worker by default, crucial for building PWAs.
Install Create React App:
npx create-react-app my-pwa
cd my-pwa
Start the development server:
npm start
Now, you’ve got a basic React application up and running.
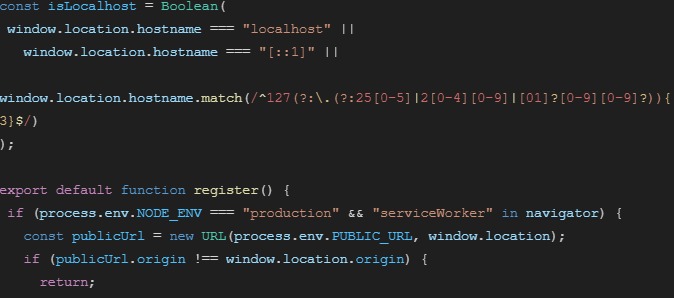
Step 2: Understanding Service Workers
Service workers are the core technology behind PWAs. They operate in the background, allowing you to cache assets and manage offline functionality. While Create React App sets up a service worker for you, it’s initially inactive.
Register the Service Worker:
Open `src/index.js` and modify the service worker registration:
import serviceWorker from ‘./serviceWorker’;
serviceWorker.register();
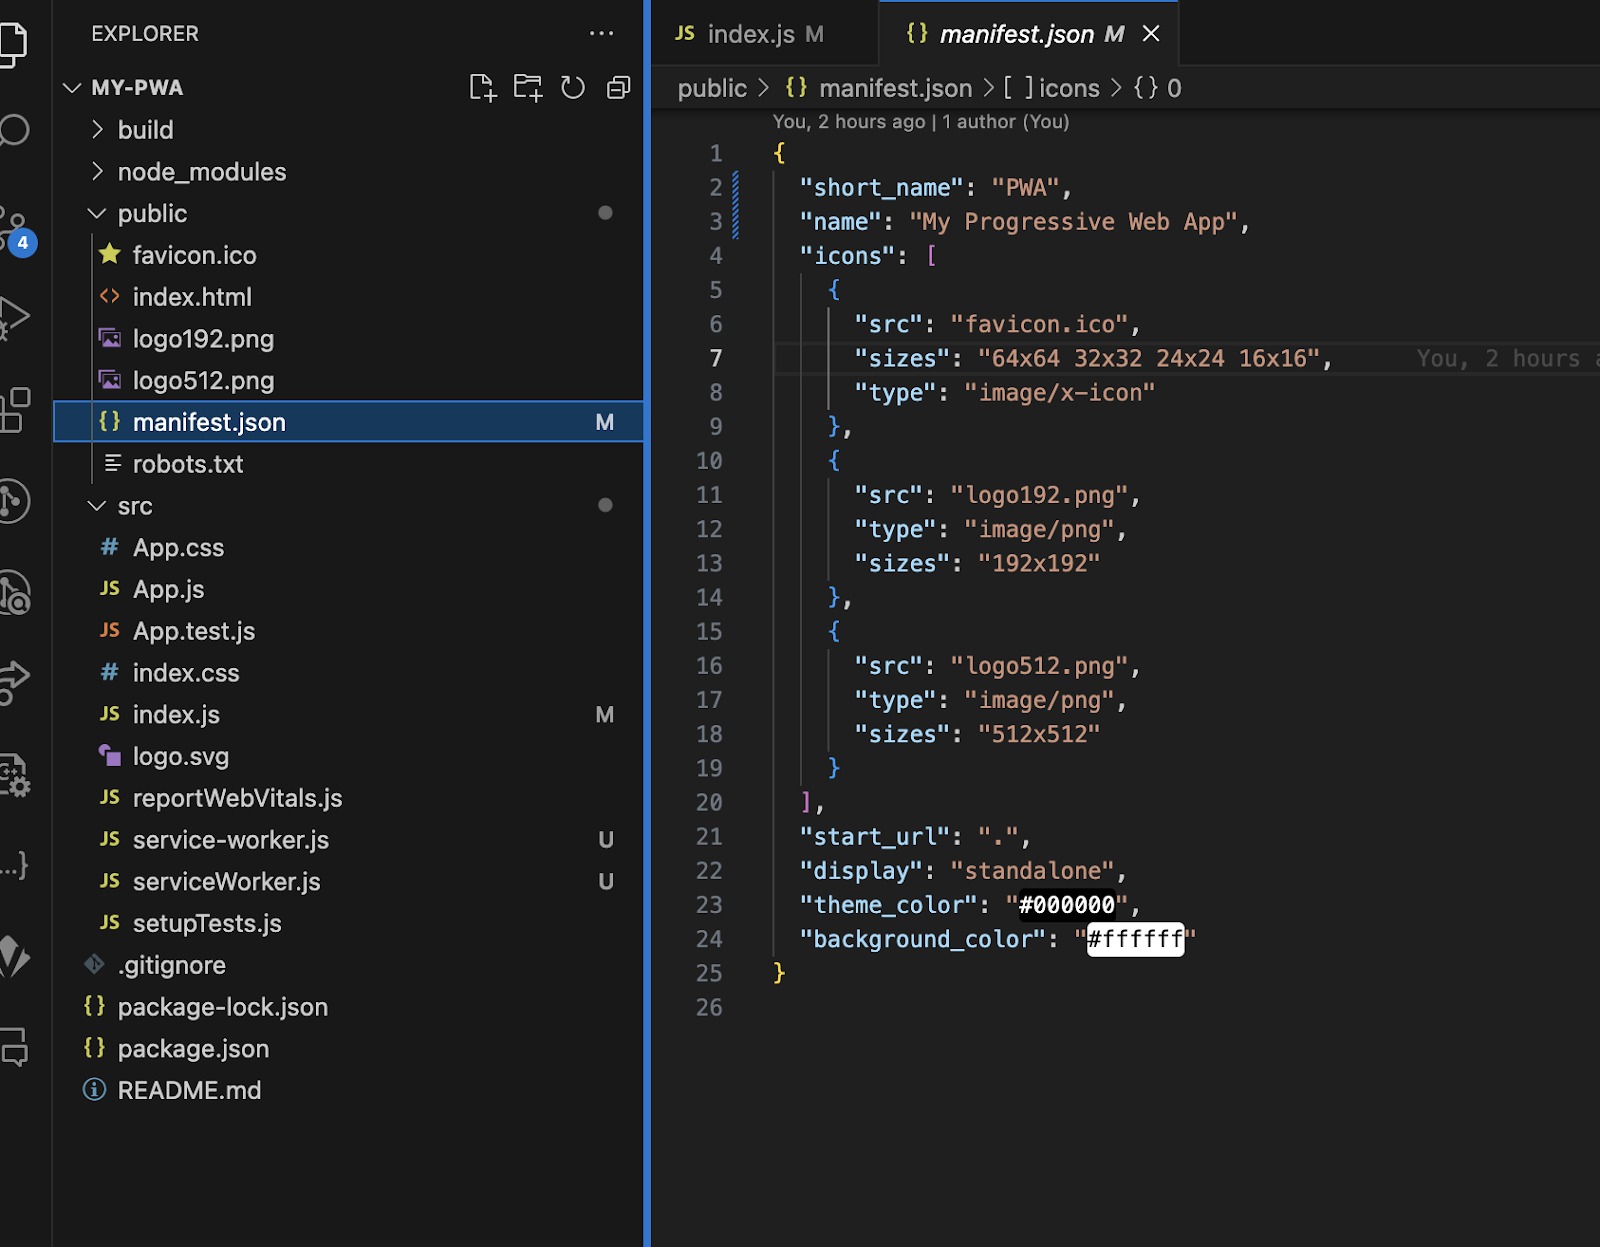
Step 3: Configuring Your Manifest File
A web app manifest provides essential information about your app, such as its name, description, and icons, in a JSON file. This file is crucial for installing the PWA on a user’s home screen.
Edit `public/manifest.json`:
{
“short_name”: “PWA”,
“name”: “My Progressive Web App”,
“icons”: [
{
“src”: “favicon.ico”,
“sizes”: “64×64 32×32 24×24 16×16”,
“type”: “image/x-icon”
},
{
“src”: “logo192.png”,
“type”: “image/png”,
“sizes”: “192×192”
},
{
“src”: “logo512.png”,
“type”: “image/png”,
“sizes”: “512×512”
}
],
“start_url”: “.”,
“display”: “standalone”,
“theme_color”: “#000000”,
“background_color”: “#ffffff”
}
Step 4: Enabling HTTPS
PWAs require secure contexts (HTTPS). For local development, you can use tools like `localhost` or services such as `ngrok` to serve your app over HTTPS.
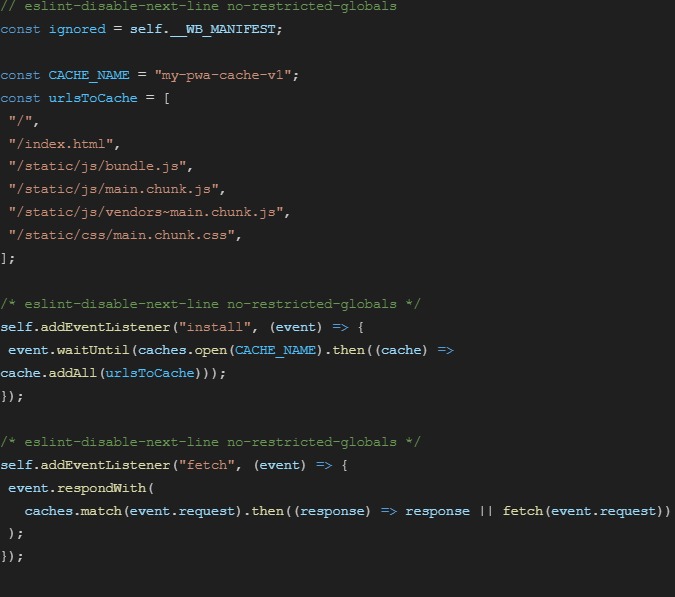
Step 5: Adding Offline Support
To ensure your PWA works offline, you’ll leverage the service worker to cache essential assets.
Modify the service worker:
Open `src/service-worker.js` and add caching logic:
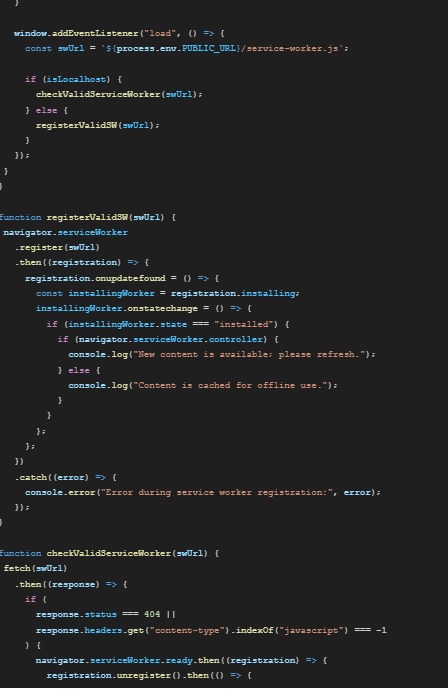
Step 6: update src/serviceWorker.js

Step 7: Testing Your PWA
To test your Progressive Web App, build and serve your app:
Build the React app:
npm run build
Serve the build locally:
Use a static server like `serve` to test:
npm install -g serve
serve -s build
Open your browser and navigate to `https://localhost:3000` to test your PWA.
Step 8: Deploying Your PWA
Once your PWA is ready, deploy it using your preferred hosting service. Make sure your service worker and manifest file are correctly configured and served over HTTPS.
Conclusion
Building a Progressive Web App with React JS is an excellent way to create fast, reliable, and engaging user experiences. By following these steps, you can leverage the benefits of PWAs, such as offline functionality and improved performance.
For those looking for expert assistance in Progressive Web App Development, partnering with a reputable software development company like Stigasoft can ensure your project’s success. With a proven track record in app development, Stigasoft offers the expertise and support needed to build robust PWAs and provide unparalleled user experiences. Embrace the future of web development with PWAs and take your business to new heights.

Gessolini: Meaning, Uses, and Why It’s Trending Online

Attrities: Meaning, Importance, and Real-Life Examples

Adsy.pw/hb5: A Complete Guide to This Shortened Link

NAEGELI Deposition & Trial in La Jolla, California Offering Expert Legal Support

QLCredit Explained: Smart Digital Credit for Modern Users

Hyperfiksaatio Explained: Meaning, Signs, and Impact

Cellulogia: Causes, Types, and Real Solutions

Professional Polish: Mastering Ethics for the Certified Trainer

Understanding RFM & CLV: The Cornerstones of Retention-Led Growth

Best Scrum Master Courses in 2026 for Career Switchers & IT Professionals
FlimFly: Everything You Need to Know About This Platform

9xMovies Baby: The Hidden World of Online Movie Streaming

MKV1234 Movies: Features, Uses, Risks and Alternatives

SonderMind Login: Your Complete Access & Support Guide

Filmygod.uk: A Deep Dive Into the Controversial Movie Hub

Who is Warden in Minecraft?

KZ43X9NNJM65: Decoding the Mysterious Digital Identifier
Why Your Desk Is Always Messy (and How to Fix It)

How to use Gemini to summarize YouTube videos

Temple Scans: Exploring the Ancient and Modern Power of Sacred Imaging
Gessolini: Meaning, Uses, and Why It’s Trending Online
Attrities: Meaning, Importance, and Real-Life Examples
Adsy.pw/hb5: A Complete Guide to This Shortened Link

How to Use a Temporary Number for WhatsApp

Sepatuindonesia.com | Best Online Store in Indonesia

The Best Methods to Download TikTok Videos Using SnapTik
-
 Tech1 year ago
How to Use a Temporary Number for WhatsApp
-
 Business2 years ago
Sepatuindonesia.com | Best Online Store in Indonesia
-
 Social Media1 year ago
The Best Methods to Download TikTok Videos Using SnapTik
-

 Technology1 year ago
Top High Paying Affiliate Programs
-

 Tech10 months ago
Understanding thejavasea.me Leaks Aio-TLP: A Comprehensive Guide
-

 FOOD1 year ago
How to Identify Pure Desi Ghee? Ultimate Guidelines for Purchasing Authentic Ghee Online
-
 Instagram3 years ago
Free Instagram Auto Follower Without Login
-
 Instagram3 years ago
Free Instagram Follower Without Login